All we have to do is associate the new certificate with the (appropriate) e-mail account. Once that is done, the encryption will be virtually transparent.. as in "automatic".
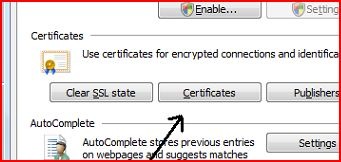
1) Verify install (Optional): Open an instance of Internet Explorer (if it isn't already) and click on the "Tools" menu item in the upper-right. Select "Internet Options" from the Context Menu. Now click on the "Content" tab. Look to the middle for the "Certificates" button, as shown below.


As shown here. If you don't see this, it means that Windows did not complete the certificate installation. You will need to re-open the Comodo e-mail, and revisit the link, and repeat the Install process.But, that's thinking negative, so let's proceed as if everything (so far) looks right.
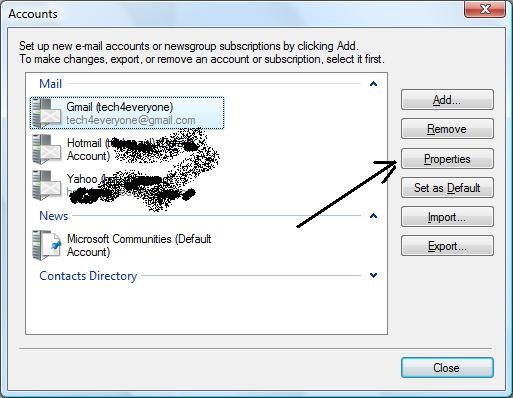
2) Associate Cert with e-mail: Close IE and open your e-mail client. In my screenshots I am using Live Mail, but the process steps apply to Vista Mail, Outlook, and OE as well. (Thunderbird and AppleMail are slightly different menu choices, but the principle is the same.) Click on "Tools", and then select "Accounts".This will list your configured e-mail accounts. 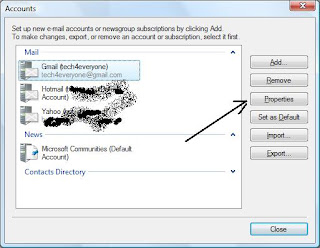

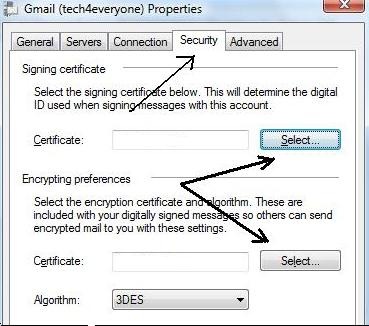
Select the account you requested the Certificate for by clicking (once) on it, {For demonstration purposes, I am associating the Cert with this site's e-mail account.} and then click on the "Properties" button. Select the "Security" tab. 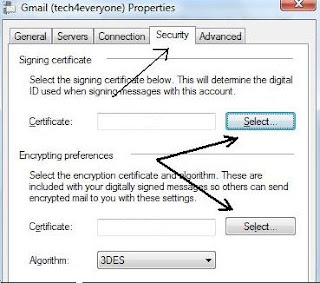


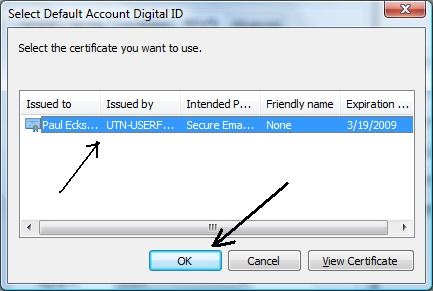
And click on the certificate shown (if you have more than one personal Certificate showing, use the dates issued to chose the correct one) and then "OK". Repeat this for the "Encrypting preferences" "Select" button.
Your e-mail account is now "Certified"! And you are ready for...
Your e-mail account is now "Certified"! And you are ready for...
3) Send a "Signed" e-mail to your friend: Address a "New" e-mail to the person(s) you want to exchange encrypted messages with, and click the "Sign" button, then "Send". By "signing" your e-mail, you are sending them your "Digital ID" and a copy of your "public key".

4) Have the other party do #3 to you: Having the other party send a "signed" e-mail to you, gives you a copy of their DID and their public key. Now you both have the keys you need to exchange secure, private, encrypted e-mails to each other.
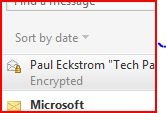
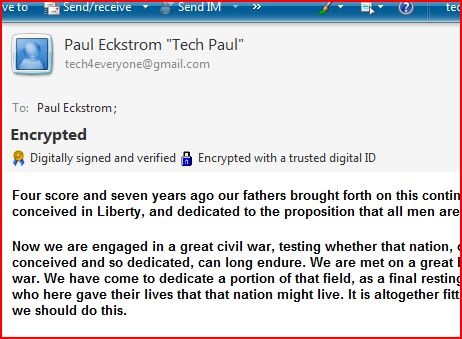
5) Click the "Encrypt" button before you click "Send": That's it.. it is now that simple. Your e-mail will appear in their Inbox like this..


and visa versa. From now on, it will be so smooth and easy, you might begin to wonder if your mail really is being scrambled/unscrambled. (It is.)
Copyright 2007-8 © Tech Paul. All rights reserved.
| Share this post : |


No comments:
Post a Comment