Today's article was triggered by a client who wanted my assistance troubleshooting a file sharing problem on a Windows network. The answer to their troubles turned out to be a very simple one, and you can avoid their headache quite easily.
Most of us have a home network (called a "SOHO LAN", Small Office/Home Office Local Area Network) of several computers connected to a router by Ethernet cables and/or to a WAP (Wireless Access Point) by "WiFi" radio signals.
This allows us to 'split' our Internet connection to all our machines; and allows us to "share" files and folders between machines.. so that I can 'access' the music on one machine, and play it on another, for example.
Tip of the day: Set your machines to the same Workgroup.
SOHO LAN networks, such as ours, are what is called "peer-to-peer" (aka "P2P"), and what you need to understand about that is: for the machines in a P2P network to "share resources" ('talk' with each other) they must all be members of the same workgroup.
My client's troubles were caused because they were using the Windows default workgroup, and had not set their own workgroup name, and this had worked fine for them.. until they brought home a shiny new Vista machine.
* The default workgroup name in XP is: MSHOME
* The default workgroup name in Vista is: WORKGROUP
See the problem? MSHOME is not the same workgroup as WORKGROUP, and so XP won't 'talk' to the Vista machine, and visa versa.
The solution is to change the Vista machine's workgroup to "MSHOME".. or change the XP machines to "WORKGROUP".. or better yet, change all your machines' workgroup to your own, custom workgroup name.
My SOHO workgroup is "THEWIZKID"... because I am a wiz, and I once was a kid.. but you can pick any name you want.
Step 1: On the PC you want to change the workgroup membership/name on, right-click on My Computer (just "Computer" in Vista) and select "Properties". 
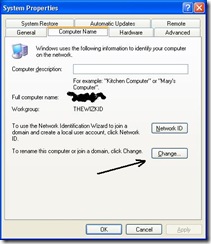
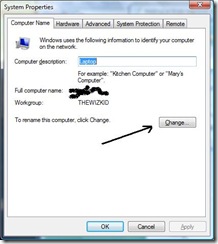
Step 2 (XP)*: Click on the "Computer Name" tab. Here you will see, and can modify, your computers name, description, and workgroup membership (as you will note, mine is already set to THEWIZKID, yours will probably say "MSHOME"). Click on the "Change" button, and enter the name of the workgroup you want to join (or create).
Step 3: Reboot your computer. When Windows starts again, your machine will now be a member of the proper workgroup and will be able to "talk" with your other machines.
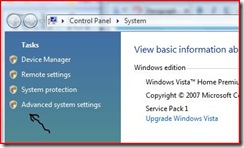
Step 2 (Vista): Click on the "Advanced system settings" link... 
and answer "Continue" to the warning. Then do the same as the XP step 2 above. 
That's it. Reboot for the changes to take effect. The trick is simply to make sure your machines are all members of the same workgroup.
Note, if you do this, and your machines still aren't "talking"/sharing with each other, temporarily turn off your firewalls and see if that resolves the issue (it almost always does). If so, you need to configure your firewall to allow file sharing on your network, which is a whole 'nother article, and my fingers are tired.. another day.
Today's free link(s): If you have installed the "new" Firefox 3 Web browser, you might want to read 12 must-have add-ons for Firefox 3, and maybe choose a few to download.
Copyright 2007-8 © Tech Paul. All rights reserved. post to jaanix

No comments:
Post a Comment